
Turn your existing playbooks, decks, and documents into realistic AI role-plays with PitchMonster. Instead of building a scenario from scratch, you can upload your source material and let PitchMonster use it to draft the role-play for you. Creating a role-play from files takes just a few steps:
1. Create a new role-playFrom the Role-plays page, click + New in the top-right corner and select Add role-play.
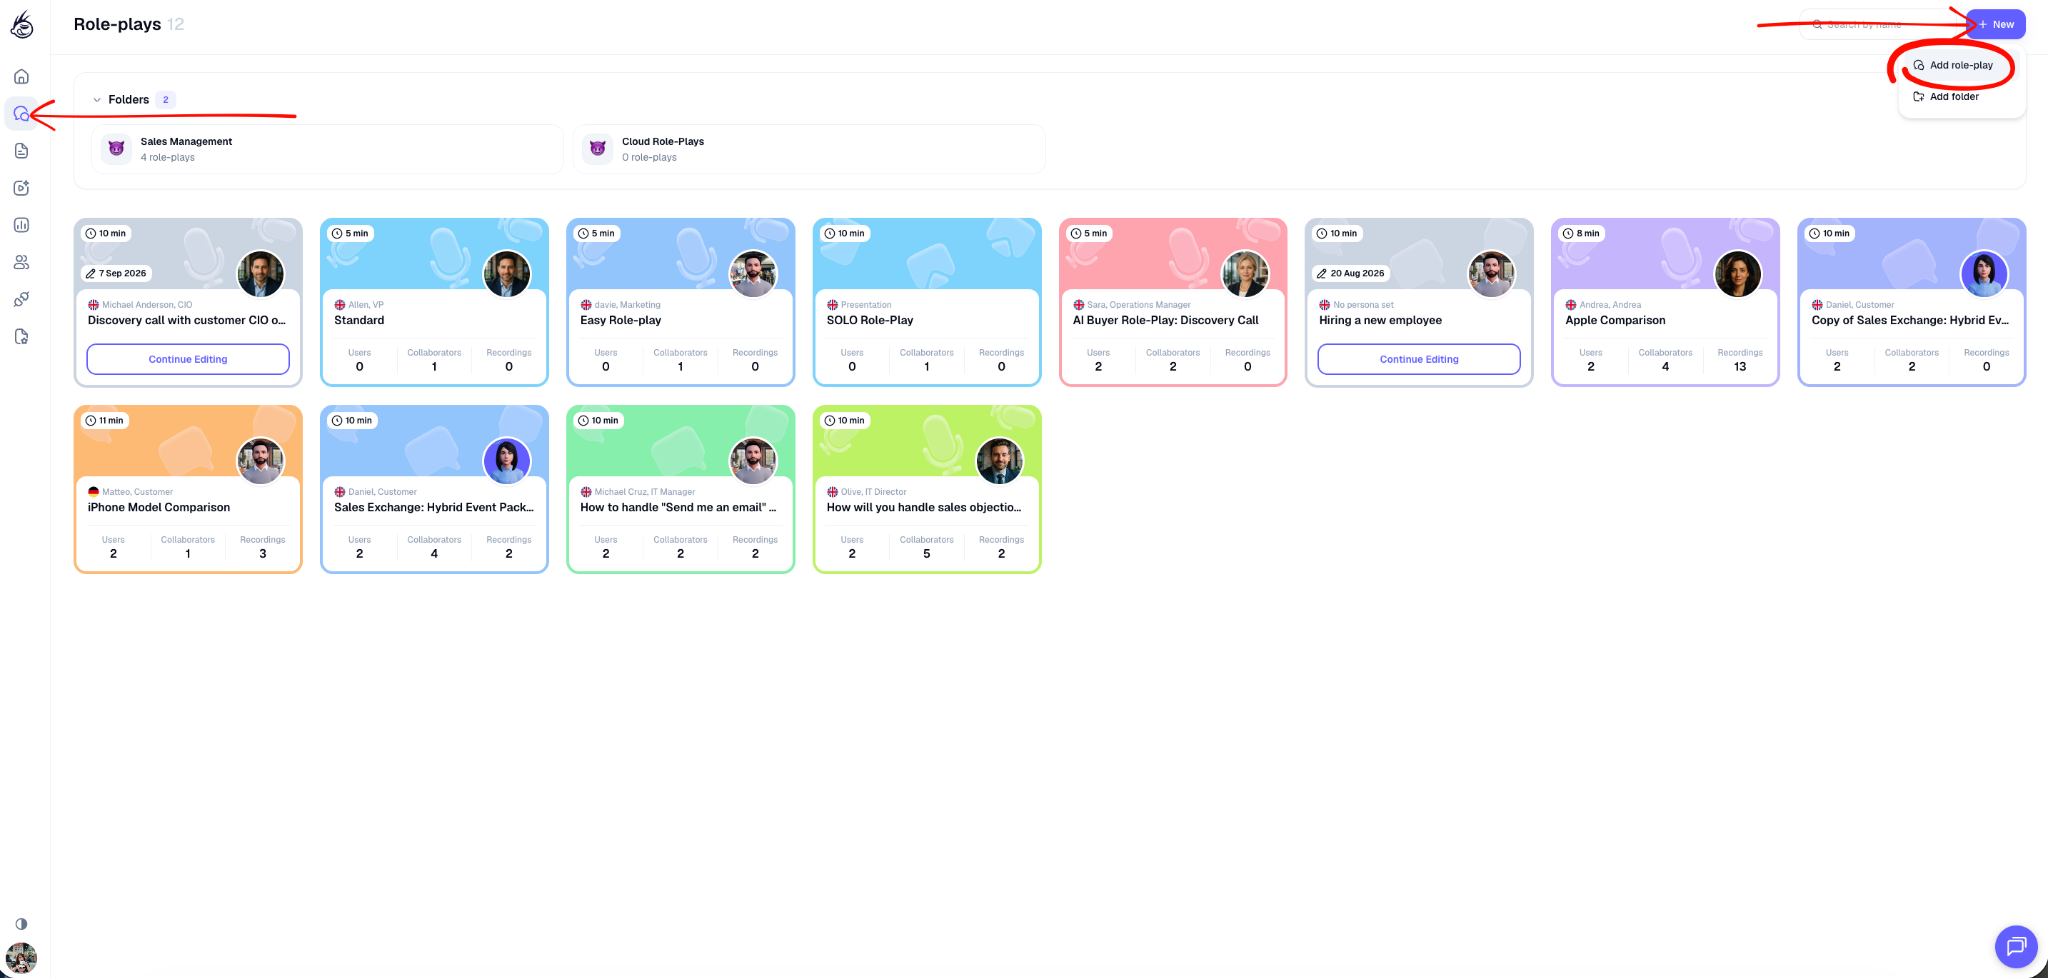
This opens the role-play creation flow.
2. Choose the languageSelect the language you want the role-play to use, click Continue.
3. Choose how to build the role-play
On the next screen, you'll see several ways to create your role-play. Select From Files.
This option is designed for situations where you already have useful source material, such as:
- Sales playbooks
- Product or service decks
- Training documents
- Call guides
- Customer information
- Process documentation
- Other relevant reference materials
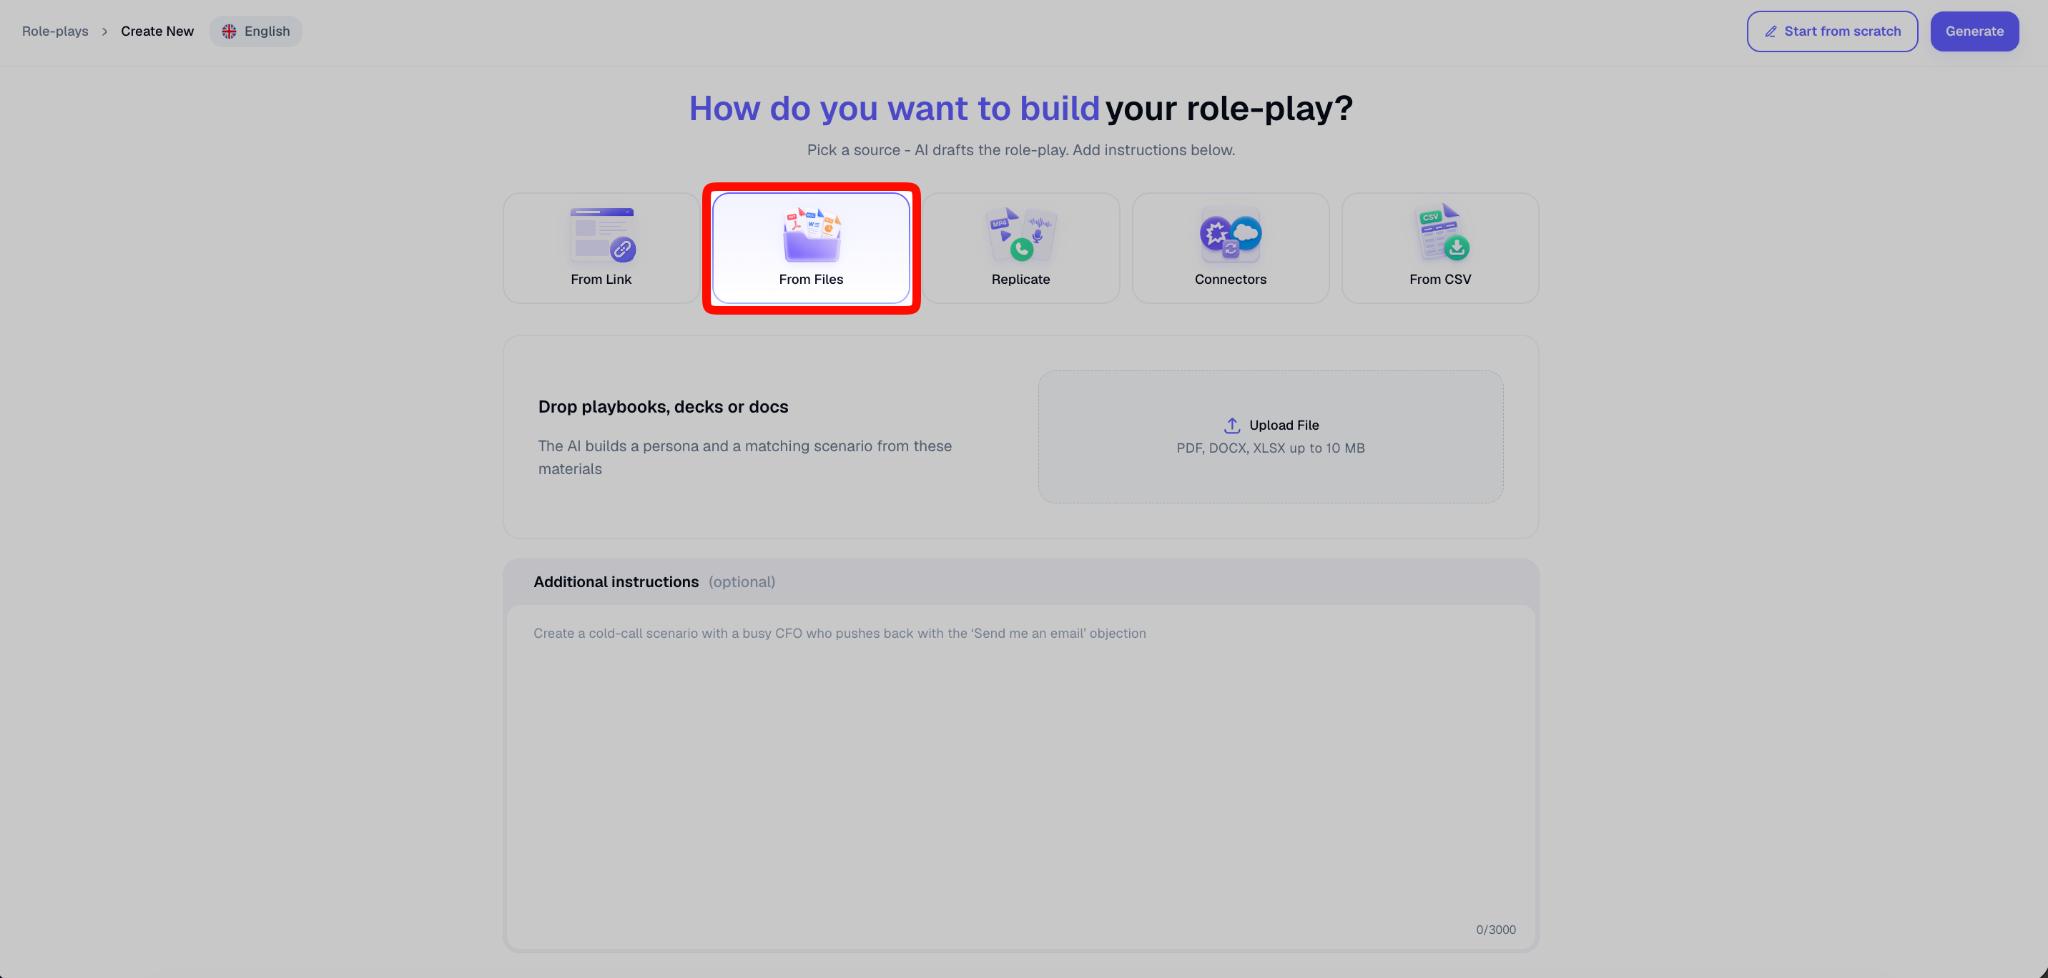
PitchMonster uses the information in your uploaded materials to help create the role-play's persona and scenario.
4. Upload your files
After selecting From Files, you'll see the file upload area. Click Upload File and add the documents you want PitchMonster to use as the basis for the role-play.
The upload area supports:
PDF, DOCX, and XLSX files up to 10 MB.
You can use multiple relevant sources to give PitchMonster more context for the scenario.
5. Add additional instructionsThe Additional instructions field is optional, but it's useful when you want to guide how PitchMonster turns your source material into a scenario. For example, you could specify:
Create a cold-call scenario with a busy CFO who pushes back with the "Send me an email" objection.
You can use this field to describe things such as:
- The type of conversation
- The customer's role
- A specific challenge or objection
- The desired level of difficulty
- A particular product or use case
- Behaviours you want the persona to demonstrate
Think of the uploaded files as the source material and the additional instructions as the direction for how that material should be turned into a practice scenario.
6. Generate the role-play
When your files and instructions are ready, click Generate. PitchMonster will process the source material and build the role-play. During generation, you'll see a progress window showing stages such as:
- Analyzing input data
- Building your role-play
- Opening editor
Keep the tab open while the role-play is being generated.
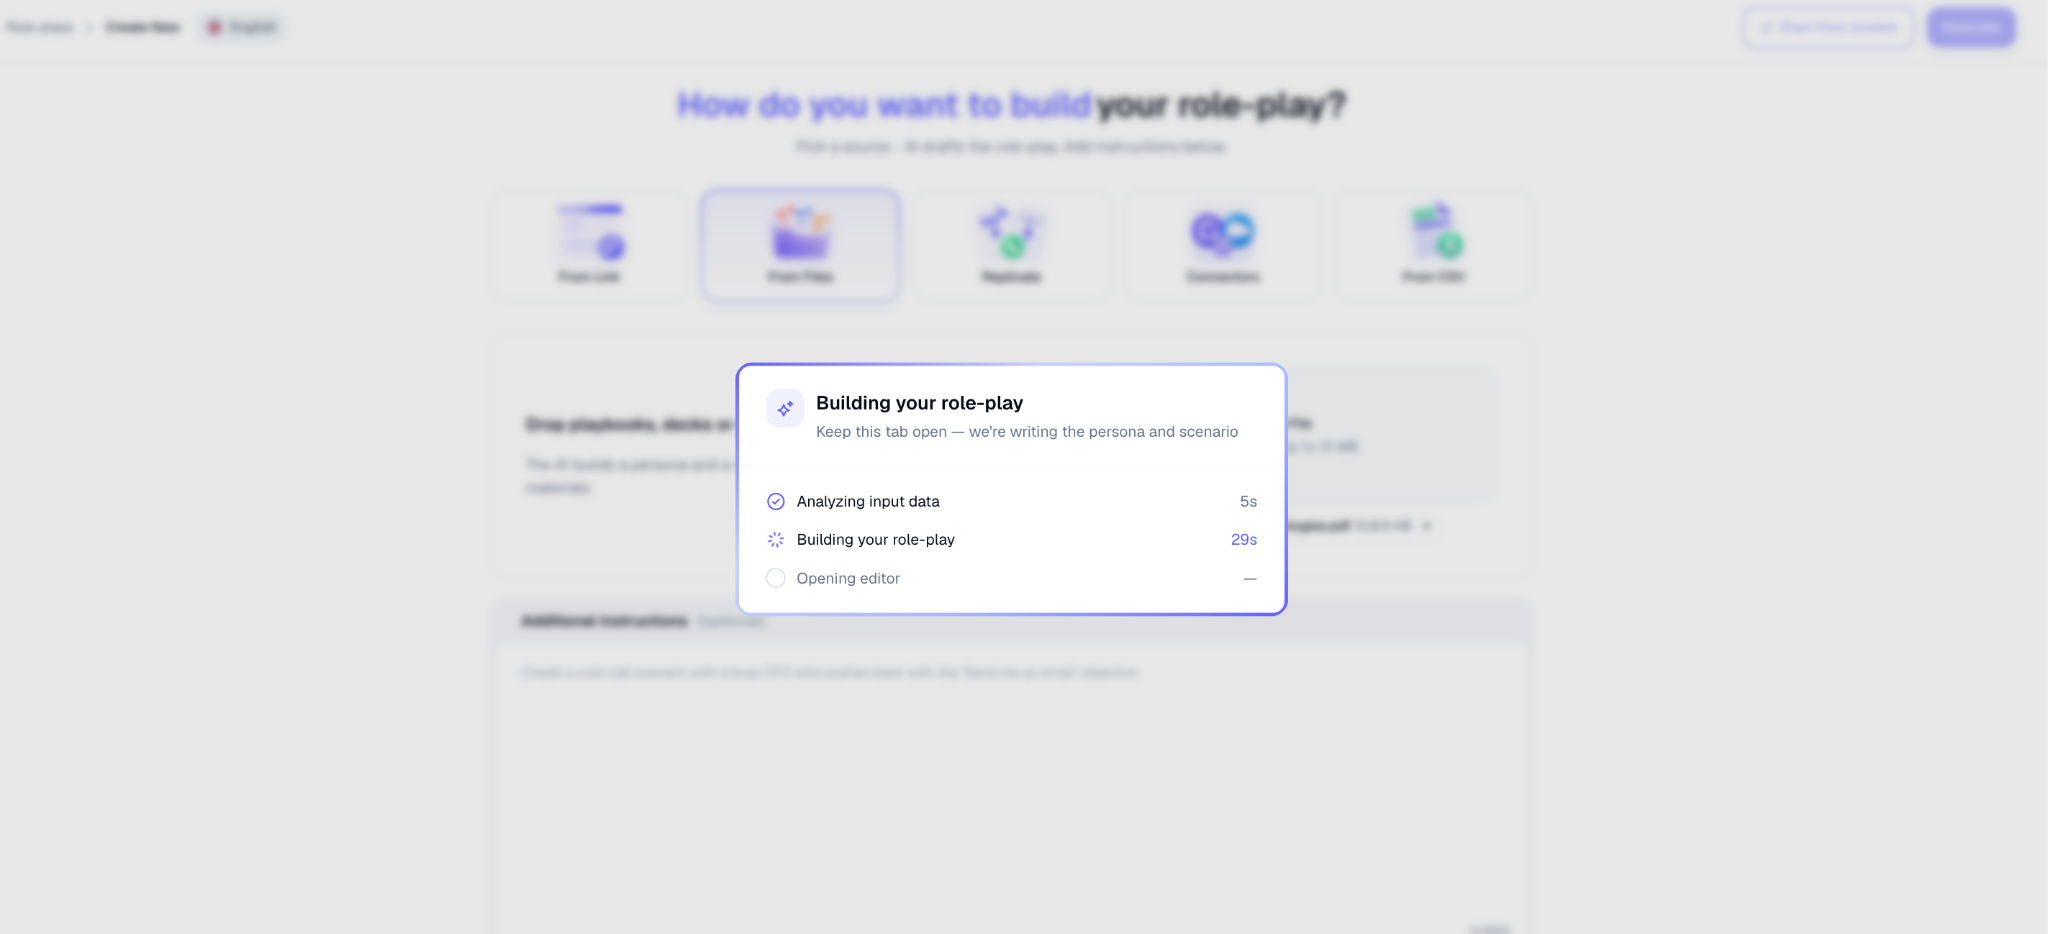
Once generation is complete, you'll be taken to the role-play editor.
Review your generated role-play
PitchMonster organises the generated role-play into several sections that you can review and customise.
1. Your User
Define the person who will be completing the practice. This includes information such as:
- Company
- Product or service
- Product or service link
- User role
2. Persona
Review the AI persona the user will be speaking with. You can configure details such as:
- Name
- Job title or role
- Company
- Difficulty
- Appearance and voice
You can also select your AI persona appearance from the Static Photo template or choose an available avatar.
3. Scenario
Define the context of the conversation. This section includes:
- Conversation context
- Conversation steps
- Objections
- How the AI should start the conversation
Review these carefully to make sure the generated scenario reflects the real situation you want users to practise.
4. Scorecard
Define what good performance looks like. You can add a goal and create metrics that will be used to evaluate the user's performance during the role-play.
For example, metrics might cover:
- Introducing yourself and your company
- Setting an agenda
- Asking effective questions
- Handling objections
- Achieving the desired next step
5. General settings
Finally, configure the role-play's general settings, including:
- Role-play name
- User video
- Screen sharing
- Ringback tone
- Time limit
- Card colour
- Email notifications
- Review permissions
- Reference files
- User guidelines
When you're happy with the configuration, save the role-play.